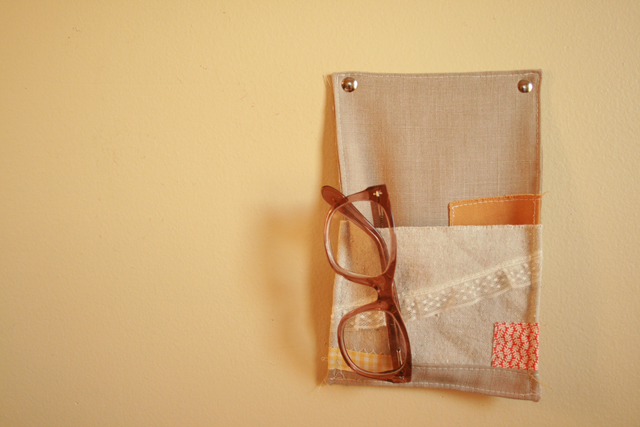
PATCHWORK-LAYERED WALLPOCKET DIY:
WHAT YOU NEED:
-scissors
-iron
-sewing machine
-fabric (I used light grey linen for the pocket, dark grey for the back, and pretty fabric scraps for the patches)
-2 metal thumb tacks
I made this little collage of fabric as a sort of guide, so I can just refer to different swatches of fabric by their number. I don't know if that will make this tutorial seem more simple, or more complicated, but let's try it anyway. I used a heavier linen for fabrics 1 & 2. These will compose the main body of your wall pocket (1 is the large back-piece, and 2 is the small front piece). Fabrics 3-5 are just whatever pretty scraps you have laying around that look good together.
STEP ONE: cut your fabric!
Fabric 1: cut 2 pieces @ 6.5" x 9.5" and 1 piece @ 1.5" x 6.5" (this will be used as a patch!)
Fabric 2: cut 1 piece @ 5" x 6.5"
Fabrics 3-5: cut out patches in whatever size you want! :)
STEP TWO: sew them patches on!
This is the most fun part - you pick the size, placement & overlap, so play with it until it looks good to you. I like to fold back the edges and iron them, so the patches look all clean and straight, but I left some edges raw, 'cause I like the varying texture. I added some lace onto mine, 'cause it felt like it was missing something. I sewed a patch onto the large back piece of the pocket, to peek out from inside the pocket when it's all finished. Also - that long skinny piece you cut from fabric 1, is going to be sewed along the bottom edge of the front pocket piece, to sort of pull it all together by repeating that back color, and also reinforce that bottom edge.
STEP THREE: sew it all together!
I don't have pictures for this, because it was the most frustrating step for me! Let me explain instead. First, you'll wanna get everything ready by folding & ironing and pinning (yawn!). Fold and iron the edges back 1/4th of an inch all around, and then place the big pieces back to back (so the folded edges are hiding) and throw that dolled-up front pocket-piece in front (tucking the folded, ironed edges between the two back pieces) and pin it so everything looks all neat and stuff. Then, slowly, carefully sew around that outer edge. I sewed as close to the edge as I could get, so those folded edges would stay put. Good luck! I almost lost my cool on this step.
STEP FOUR: tack it up on the wall and put it to use:
Hope you guys like the tutorial. I definitely wanna see what you come up with, if you decide to give it a go. They're surprisingly convenient little things. I wanna make one to put next to the front door, for my car keys - I always throw my keys on the floor, and I can never find them!
-Elizabeth


This looks so cute Elizabeth, I will definitely have to give it a try sometime!
ReplyDelete~Alyssa
www.butterfliesonmars.blogspot.com
Cute idea y'all!
ReplyDeletethis is v.cute - I really should make one of these for my glasses!x
ReplyDeleteThis is lovely, Lizzy! This would be perfect for in-coming/out-going mail. And, your glasses are quite amazing. Wish I wore glasses 8-)
ReplyDelete